

I-tip tail extensions for horses are attached with small microrings — no glue, wax or heat, for a natural result without damaging the hair. Read more about placing horse extensions.
How do I-tip tail extensions for horses work?
Installing I-tip tail extensions requires precision and craftsmanship. Small strands of the horse's natural tail hair are pulled through a microring, after which the I-tip extension is firmly secured with a pair of pliers. This keeps the extensions firmly in place, even during intensive activities such as riding or shows. Because no heat or glue is used, the process is gentle on your horse's natural hair. An added benefit is that your horse's natural hair can keep growing undisturbed as long as the extensions are well cared for.
The extensions can in principle be placed anywhere in the tail, but you get the best result at the end of the tail root. This is the point where the tail changes from skin to hair, creating a natural and seamless transition between the extensions and the horse's natural hair. If there is a sparse spot, make sure some hair falls over the rings so they are not visible. Also, the extensions must always be able to move freely so they cannot poke the skin. So always keep a distance of about 1 cm from the base of the tail hair.
Benefits of I-tip tail extensions
There are several reasons why I-tip tail extensions are becoming increasingly popular among horse owners. Here are some key benefits:
- Natural look: One of the biggest advantages of I-tip tail extensions is their natural appearance. Because they are made from 100% real horsehair, they blend seamlessly with your horse's tail. This gives a full, healthy tail without it being obvious that extensions have been applied. This natural look is especially important at shows or competitions, where a perfect presentation of your horse matters greatly.
- Durability: I-tip extensions stay in place for about 4 to 6 months, depending on how fast the natural hair grows. After this period the extensions need to be moved up again to prevent them from slipping too far down and causing damage. Your horse's natural hair keeps growing, which means the extensions slowly move further from the base. Just as people have their own extensions redone every 3 months, it is important to do this in time for horses to keep the hair healthy and prevent damage.
- Protection of the natural hair: Another benefit of I-tip tail extensions is that they protect your horse's natural hair. Because no glue or heat is used, there is less risk of damaging the natural hair, and the horse's own hair can keep growing as long as the extensions are well maintained. This makes them a safe choice for horses with thin or damaged tails, which can benefit from extra volume without further damaging their own hair.
- 100% real horsehair: At The Horse Extensions Factory we only use 100% real horsehair for our tail extensions. This not only gives a natural look, but also makes the extensions easier to maintain. Real horsehair reacts the same way as your horse's natural hair, which means it can be washed, brushed and styled in the same way.
-
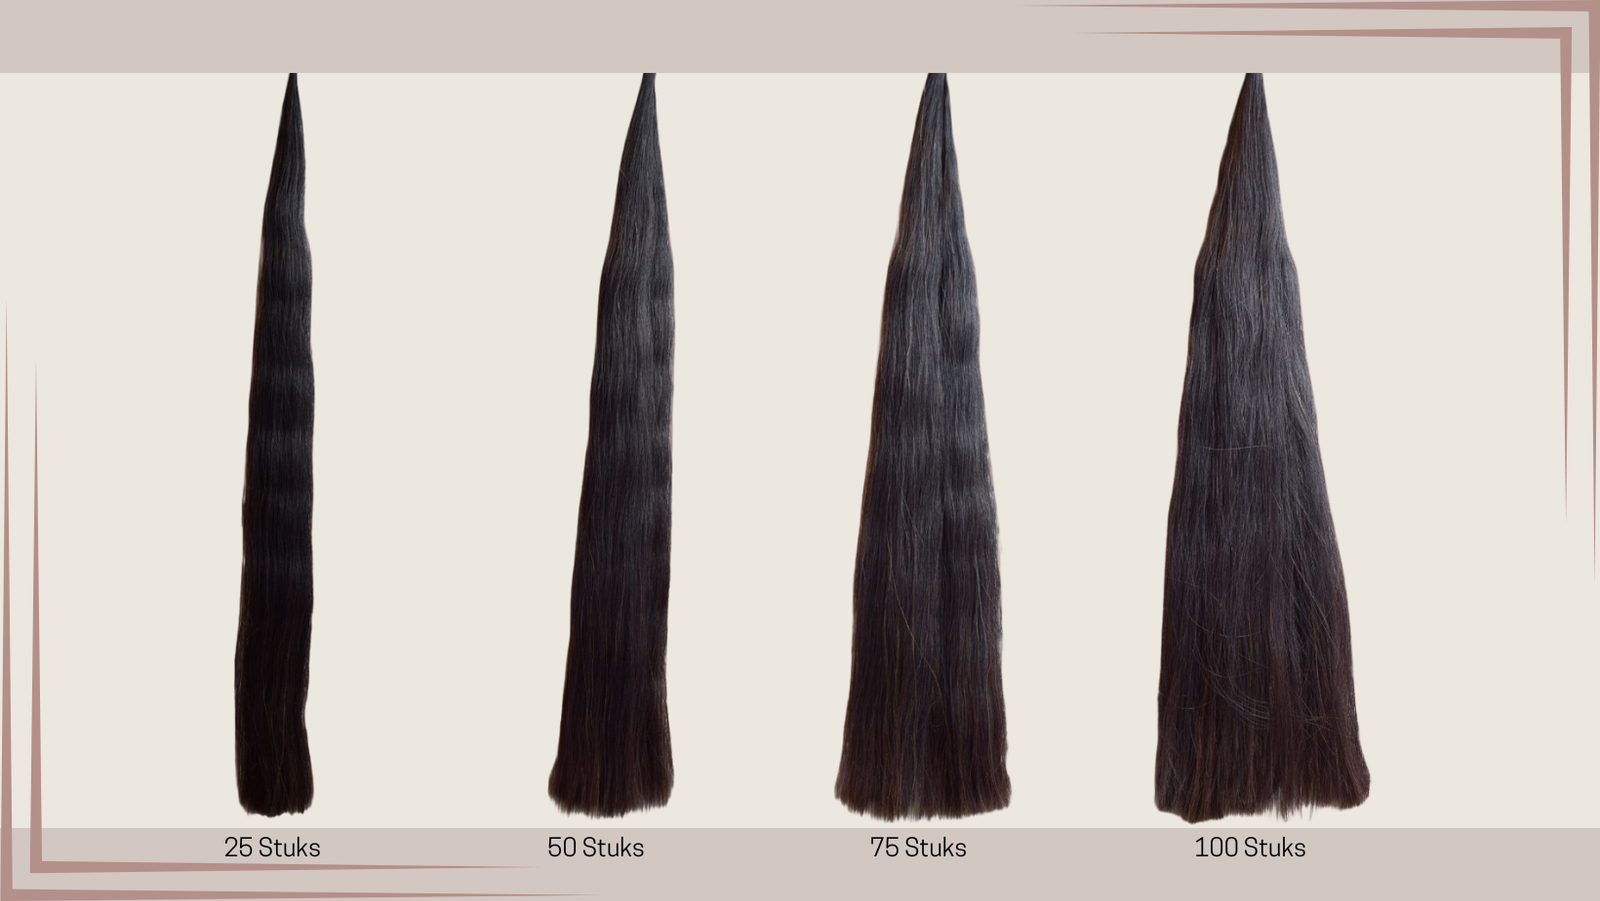
Flexibility and versatility: I-tip tail extensions are available in a range of colours, so you can always find the perfect match for your horse's tail. Whether you are looking for subtle lengthening to make the tail a little fuller, or more striking extensions for a competition or show, I-tip extensions offer the flexibility you need to achieve the desired effect.
Which horses are I-tip tail extensions suitable for?
I-tip tail extensions are ideal for a wide range of horses. They are often used on horses with thin or damaged tails where extra volume is desired. This can be the result of genetics, damage from external influences, or hair breaking off due to improper grooming techniques. Tail extensions not only offer an aesthetic solution, but can also help protect the tail while the natural hair recovers and grows.
In addition, tail extensions are perfect for horses that regularly take part in competitions, shows or photoshoots. A full, healthy tail is often a sign of a well-groomed horse and can be an important part of the presentation in competitive settings. Using I-tip extensions ensures your horse always looks its best, regardless of the condition of the natural tail.
How do you maintain I-tip tail extensions for horses?
Maintaining I-tip tail extensions is crucial to keeping them looking their best and your horse's natural hair healthy. Here are some tips for maintaining the extensions. Also read our tips for caring for mane and tail.
Washing the tail extensions
When you wash your horse's tail with shampoo and/or conditioner, make sure the conditioner does NOT reach the base of the extensions. Conditioner can cause the microrings to come loose and the extensions to start slipping. Keep the conditioner well below the base to prevent the extensions from sliding out of the tail. If the extensions do slip and fall out, you can simply reattach them. Always use gentle, natural products that do not weigh the hair down or make it greasy.
Brushing the tail extensions
Always start at the bottom of the tail and work slowly upwards, so you can remove one knot at a time. Hold the tail just below the base of the extensions while brushing so you don't pull on the extensions. This prevents the hair or extensions from coming loose. Use slow, flowing movements to gently untangle knots, which reduces the chance of breakage.
Using detangling spray
If you apply a detangler to the tail before brushing, make sure you keep the spray well below the base of the extensions. If the detangler touches the microrings, the extensions can start slipping and fall out. Should this happen, you can easily put the extensions back in. Regularly using a detangling product leaves hair smoother, prevents knots and extends the life of the extensions.
To protect your hands and make brushing easier, you can use old riding gloves. The detangler can transfer onto the gloves, which lets your fingers glide through the tail more easily.
Reusing tail extensions
A big advantage of I-tip tail extensions is that they can be reused multiple times until they are worn out. You only need new microrings and, if necessary, new tools to reattach them — both products are easy to order via our website.
Removing the tail extensions
Removing the tail extensions is easy: gently squeeze the rings open, then take the extensions out and remove the microrings. Since owners place the extensions themselves, they can also remove them without any problems. This makes the system user-friendly and cost-efficient.
Make sure you have a clean base
Before you place I-tip tail extensions, it is important that your horse's tail is clean and free of all kinds of products, such as conditioners or oils. This ensures the extensions can be secured properly and are less likely to slip. The rate at which the extensions wear out varies per horse, so it is important to check regularly how the extensions are holding up.
Good to know:
Attention! If your horse's colour is not among them, just contact us!
Check out before-and-after photos: thehorseextensionsfactory.nl/fotos
Follow us on Instagram: instagram.com/thehorseextensionsfactory
And like us on Facebook: facebook.com/Thehorseextensionsfactory
Want more information or help placing your extensions? Get in touch with us!
See our DIY I-tip tail extension kits.